Monthly Archives: March 2017

Ask What Not Why?

By Susi Hately, B.Sc. Kinesiology, C-IAYT Yoga Therapist

There are all sorts of theories on improving movement which will help people to reduce pain, and improve performance. They all work, for a lot of people, most of the time.

Where all of us fall into a trap is when we get stuck on the theory that works the majority of time. Because of the success, our minds fall into a template mode that says “this is what is done for this condition, or, for this movement problem”. This can happen not only for us as the providers of care, but as clients too. The thinking becomes rigid, almost religious. When the inevitable happens – ie the theory doesn’t work in a situation – we become stuck. Because of our template mode way of thinking, we can’t see what is “actually” going on, and our eyes become “shaded” from reality.

I see this a lot with weak glutes. The common refrain is people have weak glutes because they are sitting all the time. However, I have seen people who have occupations that require no sitting at all, or very minimal sitting and their glutes are not firing properly. I also see people who sit a tonne, and their glutes are firing really well. So, it isn’t just about sitting. It’s also not just about standing with poor posture. Sure those are contributory factors, but if those two scenarios were the actual issue than there would be many, many more people with weak glutes, and that is not what I am seeing or nor is it what I am hearing from other practitioners who work in different subsets of rehabilitation.

So what to do? How can we get out of template mode and learn to see more clearly?

Instead of drilling into an answer, ask a question. What else is going on in this person’s body that is leading to the current situation?  As it relates to the glutes, the question might be, what else is going on in this person’s body that is leading to the glutes not engaging properly?

To answer this question as a care provider, you will not be required to look in a book, or register for another class promoting another theory. You will need to look at your client and actually see what is going on.

To answer this question as a client, you don’t need to necessarily dump the person who is providing you care, you simply need to notice what is going on in your own body. Not your friend’s body who apparently has the same condition.

What you will find is that the answer is different depending on the person. For some, there is a real rigidness in the tissue under the lower ribs, and when released, the glutes automatically begin to engage properly. Or, the rib cage begins to brace part way through the movement and if movement only happens as far as there is no bracing, the glutes begin to work better. Other people hold their jaw tight. Others overuse their outer calf or their pelvic floor instead of their glutes. Others need to release through their lateral line, or have to relearn how to twist properly.

The key is there isn’t one answer, and truly the patterns of limitation are endless. The key is to be attentive and simply watch your client and then act based on what you see. Or, if you are the client, as you are attentive to your own self moving, you can then make a change.

What I love about this way of thinking is it encompasses pretty much every movement theory out there. When you are actually watching someone, when you are being attentive to yourself and what you are seeing is a contributor (notice I didn’t use the word causal), then you will see more clearly which tool, which theory would be most appropriate at a given time. This gives you much more clarity and versatility with helping your client or yourself. And, it is a way more fun process for solving problems.

Here is another added bonus:

For the client – As you become more attentive, you become more aware, and you can integrate that awareness. As you do, you will move better, you will feel better, your pain will go down and the opportunities and freedom will go up. You will begin to see possibility again for your life. Why? Because you can’t change anything you aren’t aware of.

For the health provider – You will be empowering your own client to be attentive and integrate their awareness so that they take what you are teaching them and really apply it. This approach, while challenging at first, truly makes our job that much more fun. Rather than being the person who the client relies on for “fixing them”, the relationship becomes one of trusted advisor – helping to refine the client’s best awareness for greater and greater gains.

The bottom line to consider over the next couple of weeks –  When you are seeing that something isn’t happening as it should, ask “what else is going on?”

Have fun with this.

Change is possible. For everyone – including you.

Have a great time exploring.

Susi

Does Dorsiflexion of the Ankle Protect the Knee in Yoga

by Susi Hately, B.Sc. Kinesiology, C-IAYT Yoga Therapist

The knees brings a sense of levity to a yoga practice, and into day-to-day activities. When they are functioning well, and without pain, they enable buoyancy, easily transferring movement and action from the hips to the feet. In yoga poses, this buoyancy is translated into the feeling of grounded lightness. Movement feels easy.

However, when the knees aren’t functioning well, it is like there is a tether holding you back, that can be annoying and frustrating as you become more and more limited in yoga poses or other activities that involve knee flexion or extension.

Which is why the “flexing the ankle” cue came to be. There is an assumption that engaging the muscles along the front of the shin, which bring the ankle into a Tadasana position, would somehow protect the knee. I understand from where this thinking arose, however, it isn’t helping improve the function of the knee, and is actually leading to greater tension in the shin and through the foot, and all in all, less knee “protection”.

Let’s Look Further:

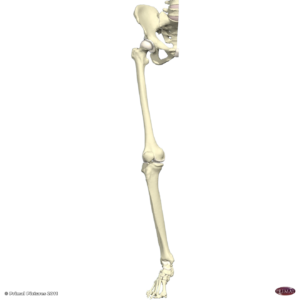
The knee is the mid way point between the hip and foot. Skeletally, it consists of the tibia, patella and femur. The tibia creates part of the ankle joint, and the femur forms part of the hip joint. What happens at those 2 joints (ankle and hip) will impact the knee.

If we look muscularly at the knee, there are a total of 13 muscles that cross the knee. Of these 13 muscles, 7 also cross the hip. Just one also crosses the ankle.

The hip crossing muscles include:

1. Rectus Femoris
2. Sartorius
3. Gracilis
4. 3 hamstrings
5. Tensor Fasciae Latae/Gluteus Maximus via Iliotibial Band

The ankle crossing muscle is:

1. Gastrocnemius

When looking at dorsiflexion of the ankle (aka flexing the ankle) and its impact on the knee, we can analyze whether the muscles that are involved in dorsiflexion also cross the knee.

These muscles that contract to create dorsiflexion include:

1. Tibialis Anterior
2. Extensor Digitorum Longus
3. Extensor Hallucis Longus
4. Peroneus Tertius

None of these muscles cross the knee, so there is not a direct impact of these muscles on the knee.

Even so, people may suggest that:

  • these muscles support the arch of the foot and as a result they support the knee. The only muscle that has been considered for that role is the Tibialis Anterior, so there is some truth there. However, most of the muscles that directly support the arches attach to the plantar or bottom side of the foot (and interestingly, some of the muscles of the hip also help support the arches of the foot).
  • the gastrocnemius is an antagonist to dorsiflexion, and it does cross the knee, so it doing so will impact the knee, since releasing the back line of the leg can, in part, help to support the knee. However . . .

If I am going to state it like it is – there are other areas that have a much greater impact on the knee. If we pay attention to them, not only will knee function improve, pain will reduce and injury will be prevented. In this case, “better function” and “prevention” is the ultimate form of “protection”.

Building True Support For the Knee

Most of the muscles that cross the knee also cross the hip. Interestingly, when we improve the movement of the hip, we improve the function of the knee. If you really want to prevent yoga injuries that are related to the knee, if you want to create better stability of the knee, and if you want to protect the knee, be sure to work with creating better stability and mobility of the hips.

An easy way to do this is to only move into your yoga poses as far as your hips can take you. If you push or force yourself into depth too soon, if you compensate and hold yourself with a grippy, tense, bracing feeling, it is quite possible that your legs will fall toward the midline of the body or internally rotate, you may torque through your knee, invert or evert your ankle, hold your pelvic floor or respiratory diaphragm too tightly, or collapse through your spine.

How Does this Relate to Dead Pigeon aka Threading the Needle?

A common place to dorsiflex the ankle “to protect the knee” happens while supine (on your back) and placing the right ankle to the left knee. If you look closely you will see many people lifting their pelvis to do the movement, overusing their back, and hardly using their hip rotators at all. This compensation can and often has massive repercussions at the knee. If you want to help your knee, be sure to that you aren’t lifting your bum to get the ankle to the knee and that you are only move the femur in the acetabulum as far as your pelvis doesn’t shift. Also be sure that you aren’t compensating by torquing at your knee, or inverting your foot so that you get little wrinkles of skin on the inside of your ankle. You don’t need to hold your foot in Tadasana to prevent this last point. Be gentle, easy with yourself.

Other resources:

You can see the hip-ankle connection in the following youtube clip on lotus pose. You will see that my ankle is comfortable, the toes aren’t being pulled to the nose, the movement is at the hip:


Remember, in order to cue well, it is vital to understand the movement of your body, how your joints function and the impact of the surrounding neuromuscular and fascia structures. You don’t have to steeped in anatomy, but you do need to have a solid foundation for seeing movement and then knowing what to do or say to help your students improve. Their progress is proportionally tied to your ability to see and communicate.

If you would like help with your cueing and your ability to see movement, consider joining me this fall at one of the Intensives where you will be steeped in Kinesiology and Biomechanics of Yoga. You will leave with an incredible knowledge of which cues work and why, and which cues don’t work and why. You will gain 20-20 vision for picking up on the way the body is actually meant to move. For more details click here

Q & A with Susi: How To Progress and Continue to Make Gains

By Susi Hately, B.Sc. Kinesiology, C-IAYT Yoga Therapist

Question: Someone does the small movements that you often teach in your therapy classes. How do they progress?

Susi’s response: My approach has arisen out of seeing that many people are unable to move into the classic yoga poses in a functional way (hence the cyclical pain patterns we often see). I would see that my students were unable to move into the pose functionally, so would break down the pose and see what the actual limiting factors were and then improve those. All of the small movements I offer are simply that – component pieces of larger movements.

So, to improve, all you need to do is add more components of the what makes up whatever activity you are wanting to get back to. Then, as you are able to do the movement more and more easily and/or be in it for a longer period of time, then more repetitions and/or more load (ie. weight) can be added.  Each of these will add more complexity. The key though, is that the person needs to continue to move with the awareness, and attention they gained in the smaller movements, with as little compensation as possible so that the joints and muscles involved are doing what they are supposed to be.

The bumper sticker:  Progress is very quick when you move specifically and thoughtfully.

Enjoy!

Susi

Key Concepts for Getting Out of Pain

By Susi Hately, B.Sc. Kinesiology, C-IAYT Yoga Therapist

People will often ask me why how my clients get out of pain so quickly and how it is that they have a long term relief. Here is a short summary of how I work, my philosophy, and some ideas on how you can apply it for yourself and your students.

One of my key concepts is “where the pain is, is not the problem, rather the pain is a sign of dysfunction or limitation”. An example of this is SI Joint Pain. So often people will come to me with a sore SI Joint wondering what they can do to relieve it. They have tried all sorts of different techniques which have provided short term gain, but they haven’t had the long term relief they are wanting. I also have teachers asking me, “what exercise or sequence do I use to relieve SI Joint pain?” Well, if you really want long term relief, there isn’t a sequence or exercise to make that happen.

Why is this so, what is happening here?

The primary reason that I have seen is that they haven’t addressed the actual dysfunction or limitation. Yes, they may have had their SI Joint and/or lumbar spine adjusted, or they have utilized yoga techniques to “stretch out” a tight muscle associated with the pain (like a tight piriformis), but they haven’t taken a step back and looked at the bigger picture. Why did the SI Joint or piriformis find themselves in a compromising position in the first place? Neither woke up one day and said, I am going to “get locked”, or “become hypermobile” or “get tight”. They were simply responding to how the forces were moving through their body and compensating for them surreptitiously.

This leads to another one of my key concepts. We can’t change what we aren’t aware of. Much of the time the limitation or dysfunction that is correlated to the pain, resides under the level of awareness. Becoming aware of movement and breath – what is moving well, what isn’t, where there is compensation, and then nurturing that which is working and quieting that which isn’t working. This is the first, second and third step toward improving how forces move through the body and shifting overall body patterns.

A third key concept is I tend to not focus on alignment. Rather I focus on good movement. I find that many people can compensate their way to alignment which often creates more tension, tightness and unease. I prefer to support someone to move well, in a range that offers ease and less pain, tension and strain since I find when I provide that sort of input the neuromuscular system responds more quickly with greater ease, softness, strength and much less pain.

So how do you apply this in your day-to-day practice and teaching:

1. Find someone who can watch you move, and has a keen eye and understanding for what is supposed to be moving in asana, and daily activity. Determine if you actually have the functional capability to do what the activity is asking you to do. Many people often discover they don’t have the movement ability to cycle or run, or to do triangle pose. This doesn’t mean they never will. It just means they don’t have the capability right now. And, when they gain that movement ability they will be able to do that which they want to do.

2. Be aware of what is driving you in your practice. What is really bringing you to your mat, and moving you into your poses? Recognize what your breath is doing even before you start. Do you automatically go into a deep Ujjayi breath? Is it easeful or is it tension building?

3. Practice in a range of motion that doesn’t increase your pain, strain, ache or levels of tension. Remember, Asana is all about “sitting comfortably and still”.

4. Remember, that your body is pretty plastic amazing and adaptive – it responds to stimulus and when you give it the input it needs, or is quietly asking for, it will respond in ways that will blow your mind.

Best,

Susi